Introduction
This article will walk you through the steps necessary to Create and
Action Templates.
Action Templates
Action Templates are used to define actions that will occur for Events. For example, an Appointment is an event. Therefore, you could define one or more Actions for that event such as Reminders or Requests for Confirmation.
Create an Action Template
The following steps will demonstrate how to add a new Action Template that can be used to send out Reminders 7 days before an Appointment.
Steps
- Sign into the LiveDDM Management Client (LMC)
- On the menu, navigate to Services -> LiveEvents
- On the LiveEvents menu, navigate to Manage -> Subscription
- Select Appointment Reminders. If applicable, your existing Action Templates will be listed
- Select Add Action Template
- Set the name of the template

- Check Template is Active if you wish to use this template immediately after it is created
- Set the Event Action Type to Auto Send Mode

- Set Trigger Days Out to -7. Any number that is negative occurs before the Event. Positive Trigger Days occur after the Event

- Set Action Behaviors if applicable

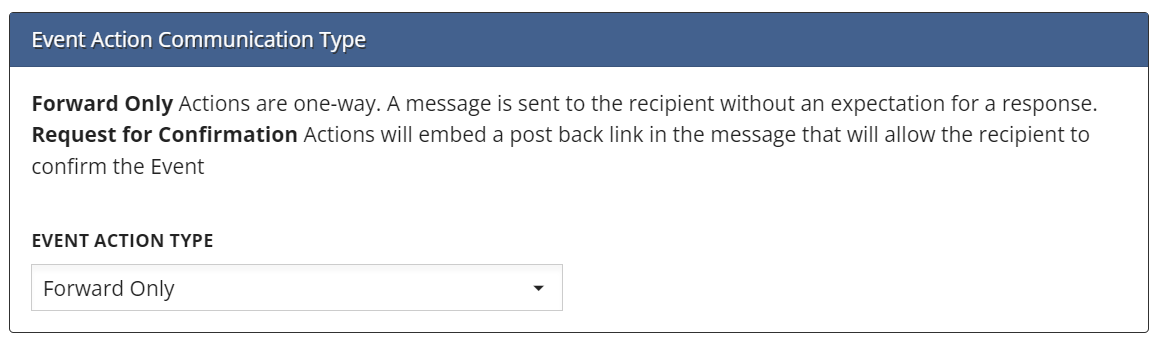
- Set Event Communication Type to Forward Only. Forward Only means that the communication is sent to the recipient with no expectation of a response
- Setup Message Templates for Email and SMS

- Click Save to create the Action Template
Manage an Existing Action Template
Steps
- Sign into the LiveDDM Management Client (LMC)
- On the menu, navigate to Services -> LiveEvents
- On the LiveEvents menu, navigate to Manage -> Subscription
- Select Appointment Reminders.
- Select the Action Template you wish to manage
- Click Save to save any changes you have made